How to Roll Out Fix Inventory AWS Permissions with CloudFormation
Each version of Fix Inventory programmatically generates the specific IAM permissions it requires to collect (and optionally, manipulate) AWS resources. Manually maintaining these permissions is a tedious task, especially if you have multiple AWS accounts.
To eliminate this pain point, we provide a CloudFormation template that automatically creates a FixInventoryAccess role with the required permissions and a trust that allows a specified AWS account to assume this role.
The stack can be deployed in a single account, or organization-wide as a CloudFormation StackSet. In this how-to guide, we use this template to create a StackSet that deploys the FixInventoryAccess role to all accounts in your organization.
The source code can be found in the someengineering/fixinventory-cf GitHub repository.
If you prefer to deploy the StackSet yourself, the S3 URL of the template to create the FixInventoryAccess role is https://fixinventorypublic.s3.amazonaws.com/cf/fixinventory-role.template.
Prerequisites
This guide assumes that you have already installed Fix Inventory.
You also need an AWS Organization that meets the prerequisites for StackSet operations.
Directions
Deploying the StackSet
- AWS Console
- AWS CLI
-
Open the AWS Organizations Console and find the Organization Unit (OU) where you want to deploy the
FixInventoryAccessrole. The role will be deployed to all accounts in this OU and all child OUs.The OU is the cryptic string underneath the OU name. To deploy the role to all accounts in the organization, use the Root OU (
r-7h7xin the below example).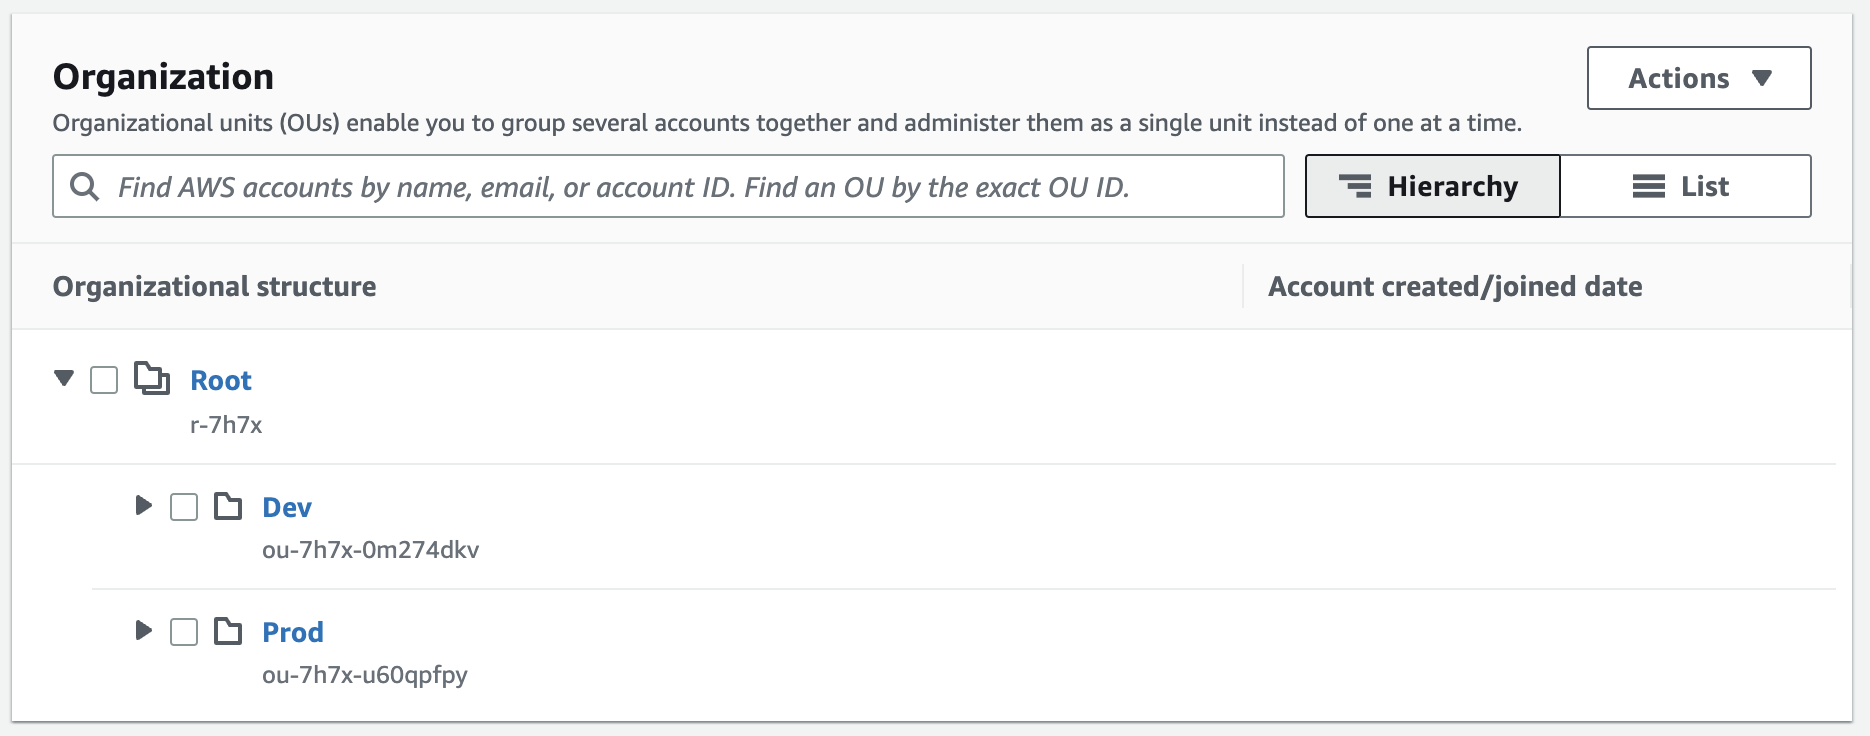
-
If you are not already in the correct account, log into the account where you want to deploy the StackSet. This account will be the account that manages the StackSet and the role that is deployed to all accounts in the organization unit.
-
Click this button to open the Quick create stack page:
-
Enter a stack name (e.g.,
FixInventoryAccess) and configure the four parameters as follows:Parameter Description DeploymentTargetOrganizationalUnitIdsThe OU (or multiple, space-delimited OUs) where you wish to deploy the role. FixInventoryAccountIDThe account ID of the account where you have Fix Inventory deployed. This account will be the one the Role has a trust relationship with. StackSetCallAsDefaults to DELEGATED_ADMINbut can be changed toSELFdepending on the permissions you have in your organization and whether the account you are deploying the StackSet in is registered as a delegated administrator for your organization (recommended).StackSetPermissionModelDefaults to SERVICE_MANAGEDbut can be changed toSELF_MANAGEDif you want to manage the StackSet permissions yourself. We preferSERVICE_MANAGEDas it allows us to turn on automatic deployments to accounts that we add to our organization in the future.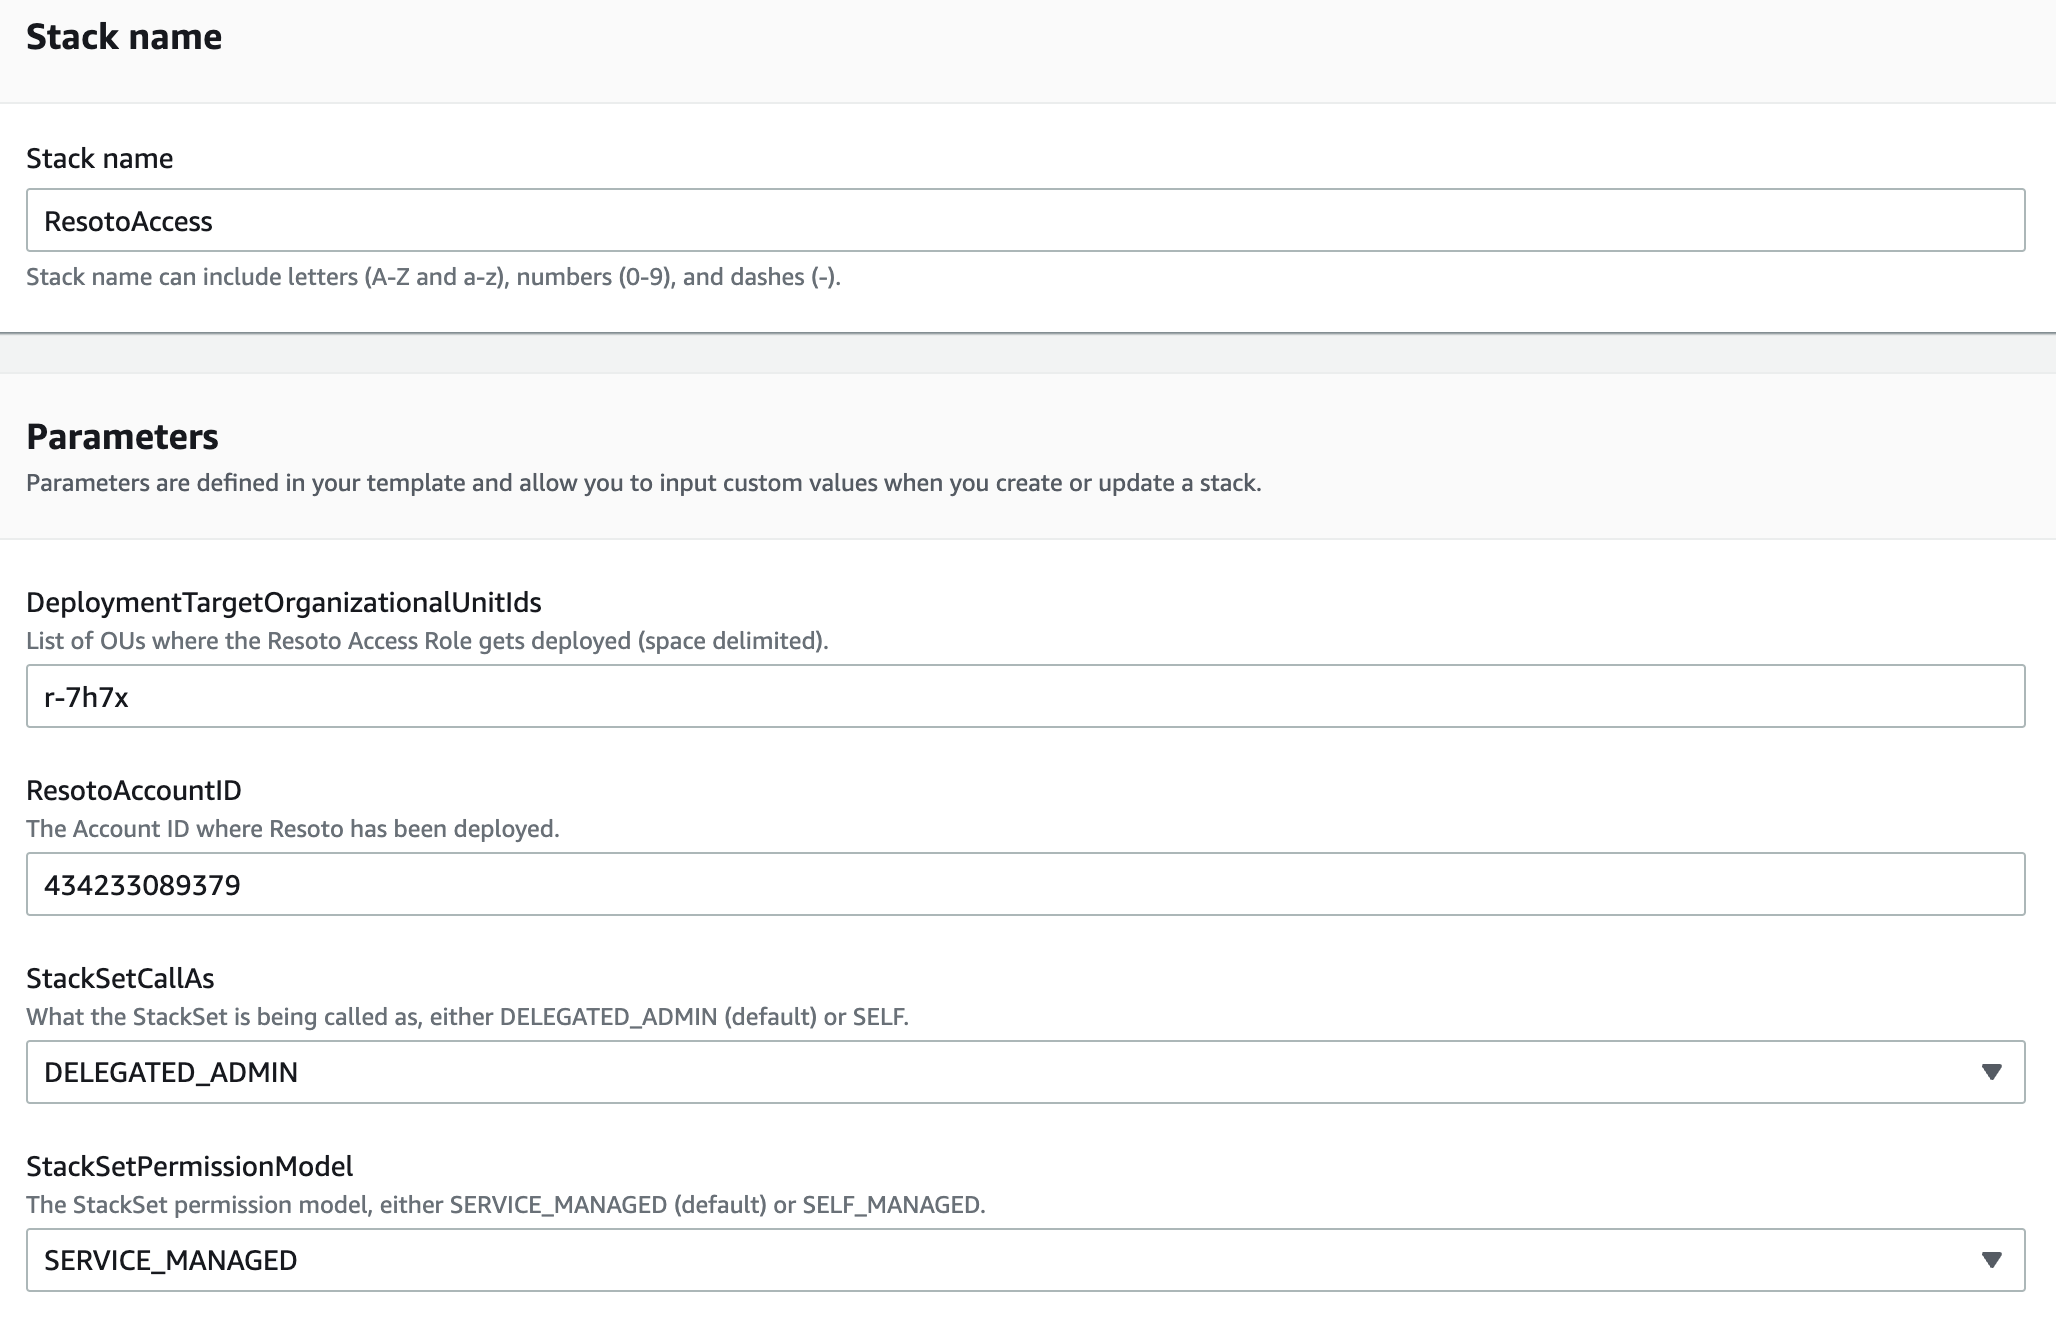
-
Click Next on both this page and the next, then click Create Stack.
The stack will take a few minutes to deploy.

-
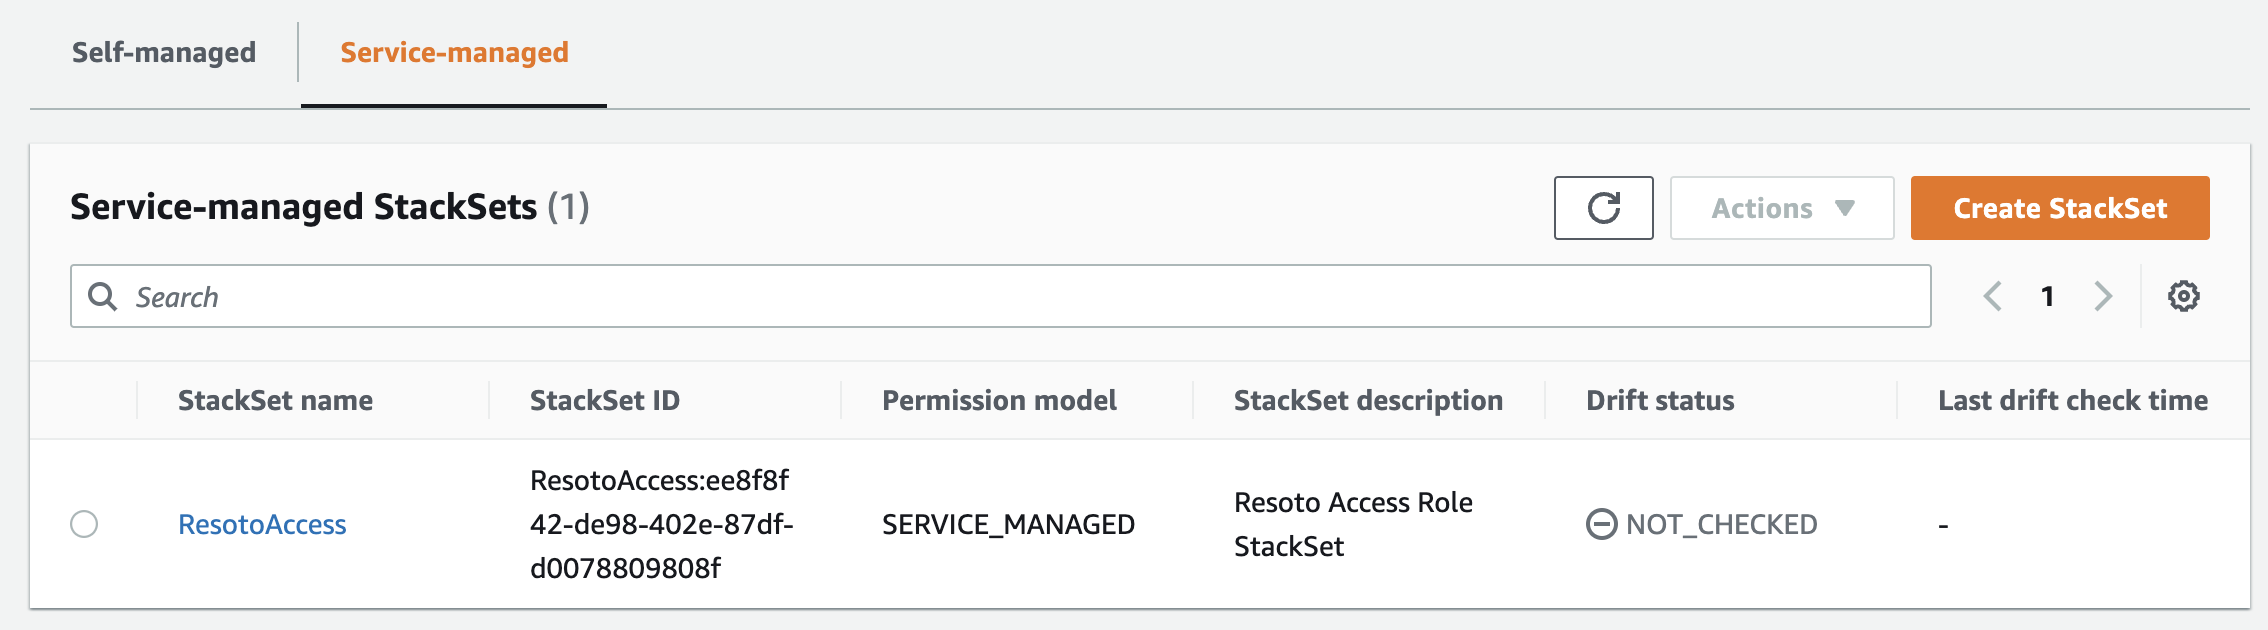
In the menu to the left, click StackSets. You can see that the StackSet is being created on the Self-managed or Service-managed tab (depending on the option you chose).
-
After a few minutes, the StackSet will be created and begin deploying to all accounts in our organization. Reviewing the stacks in
us-east-1, you should now see a new stack created by the StackSet: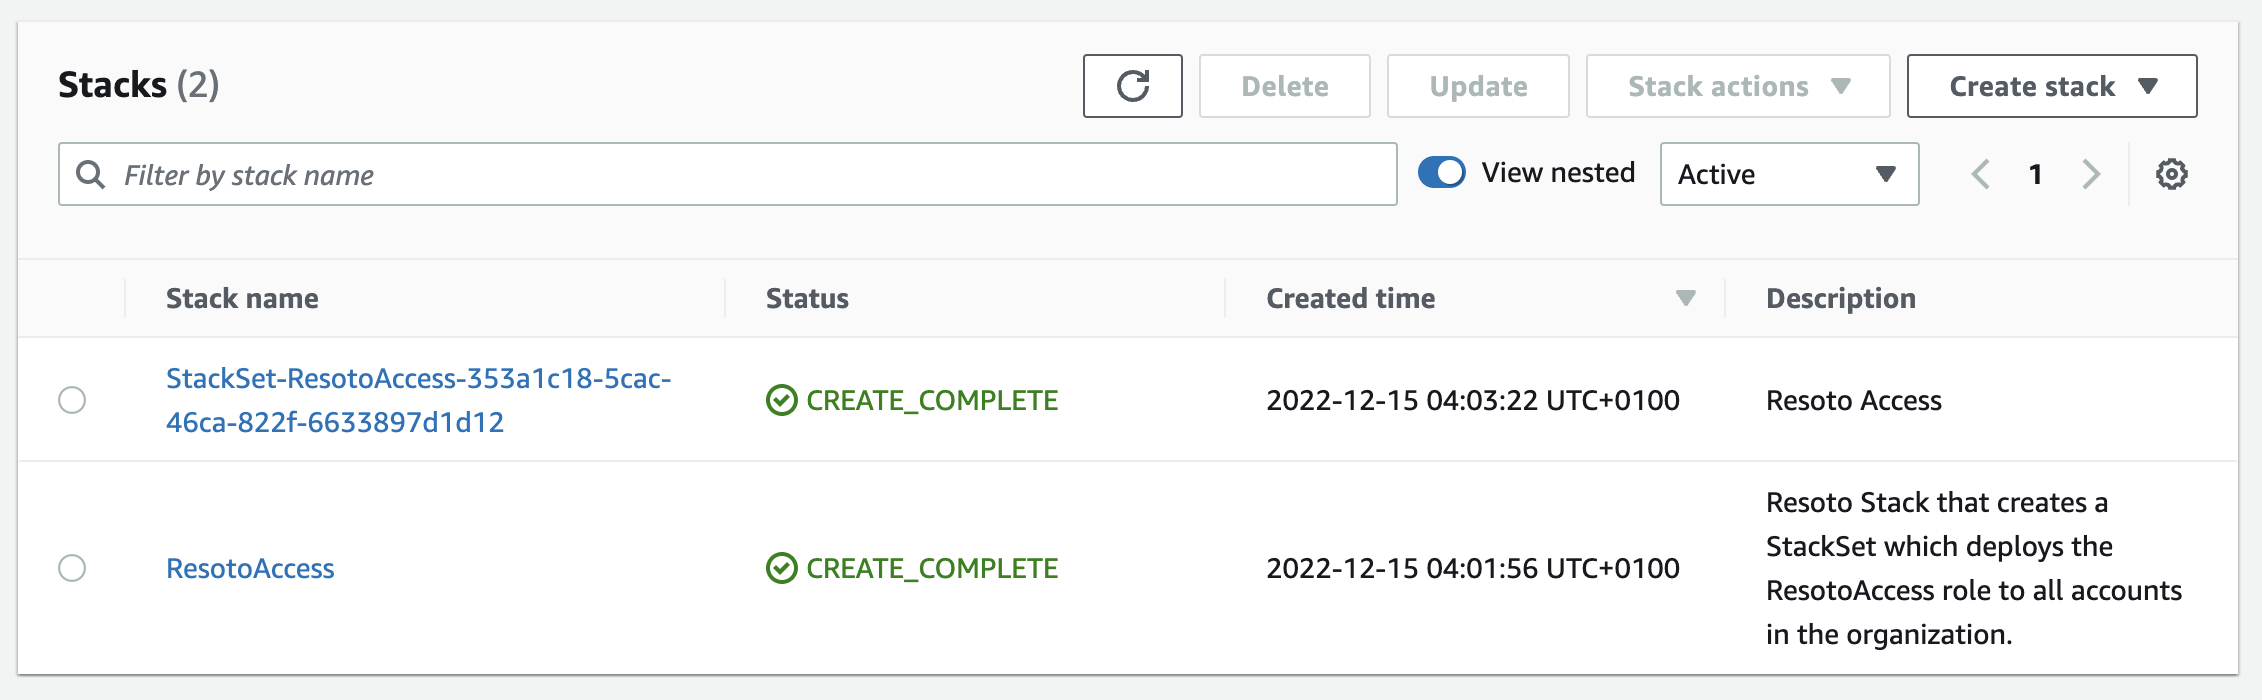
If we click it and check out its resources, you will see the
FixInventoryAccessIAM role: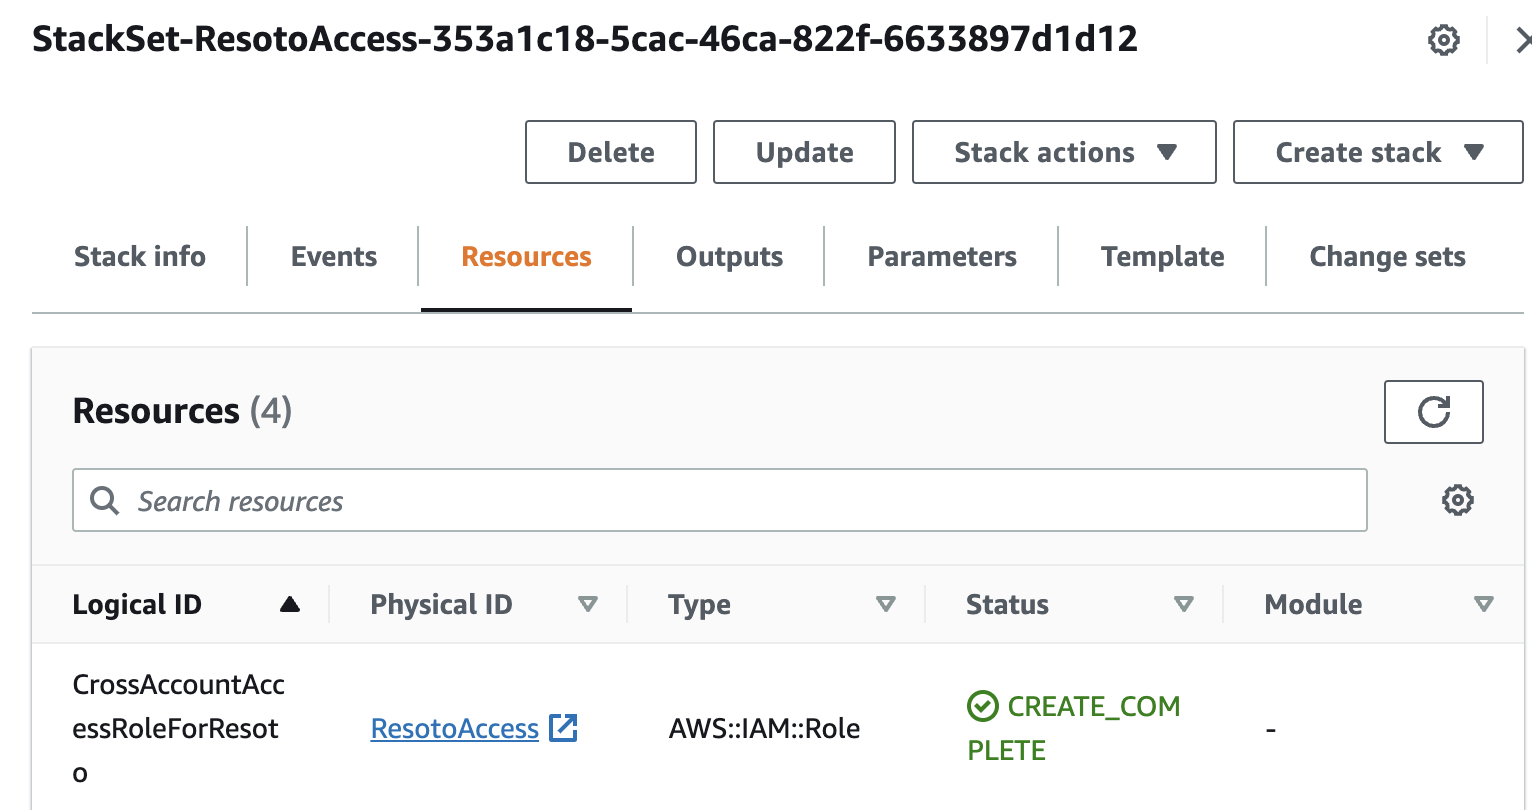
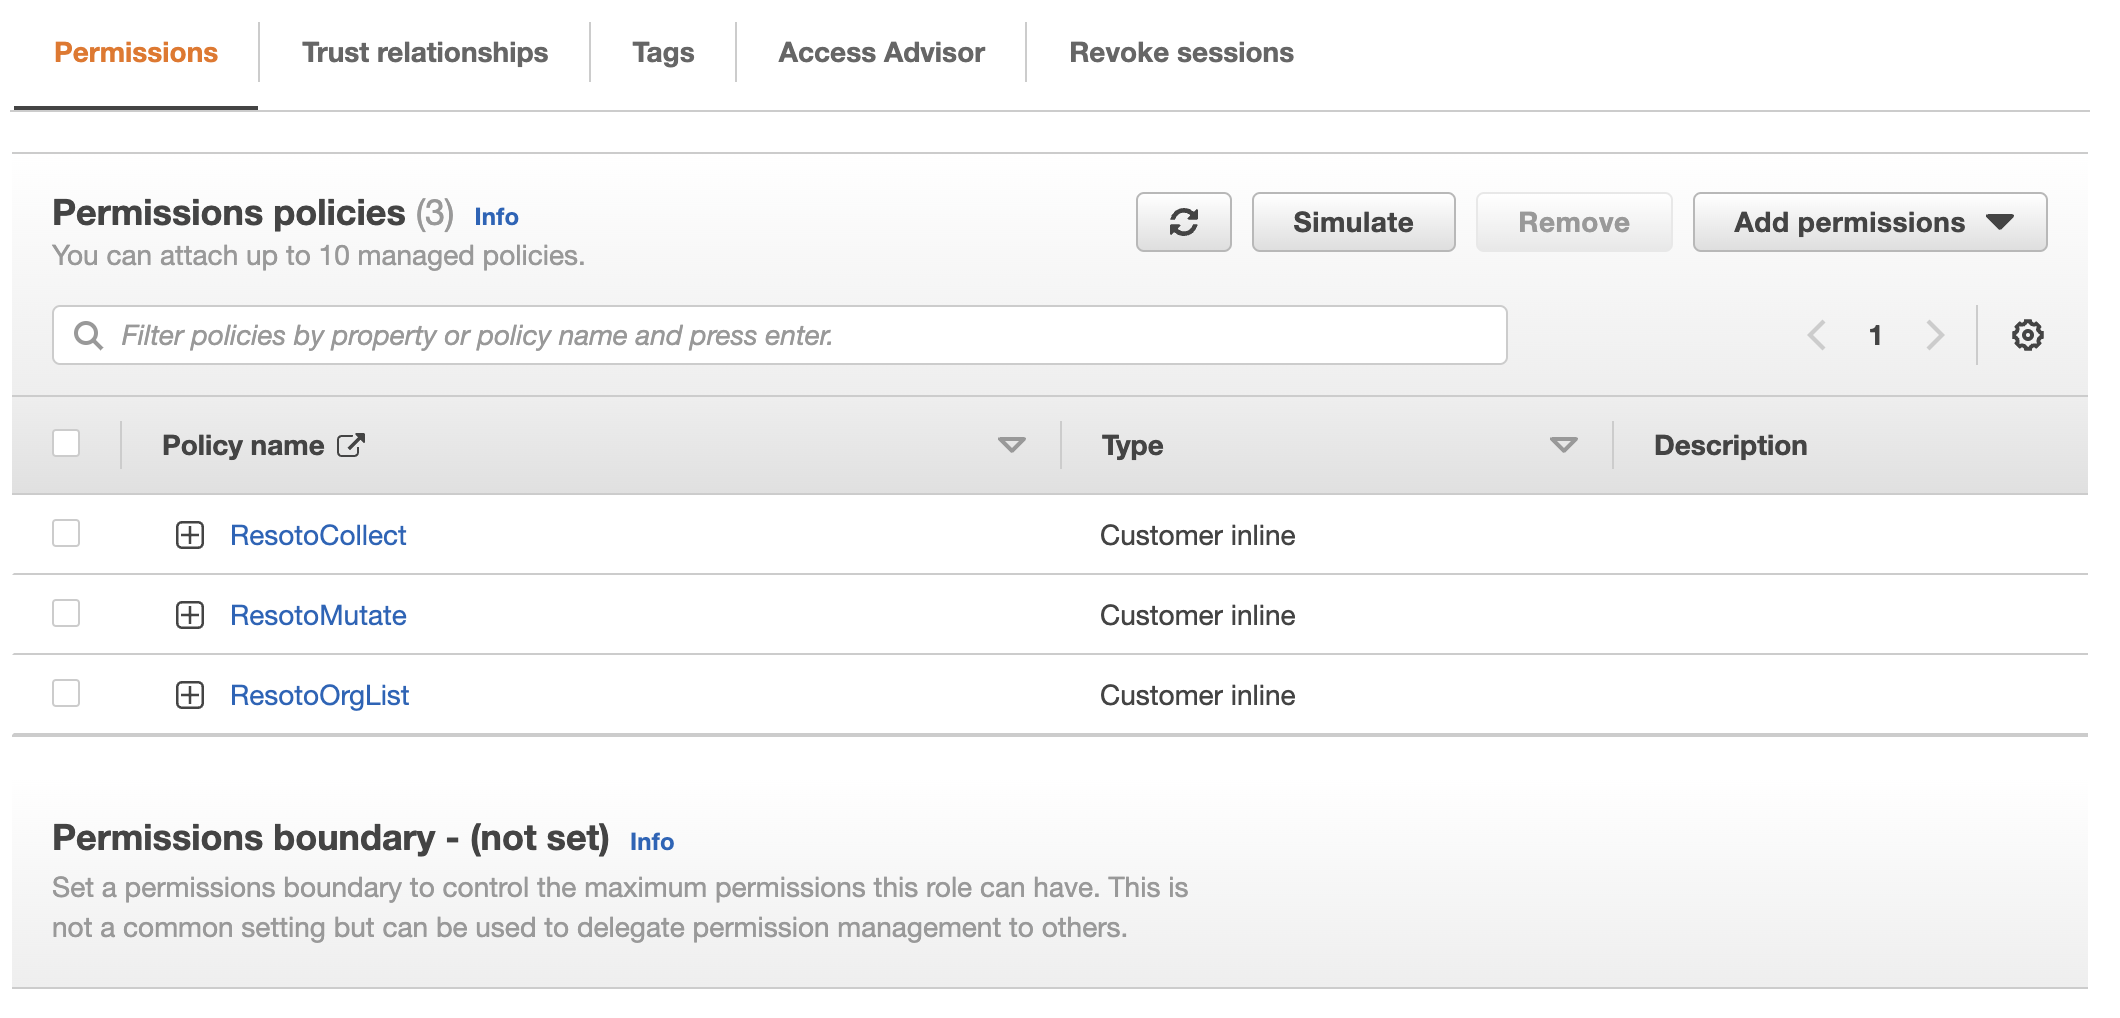
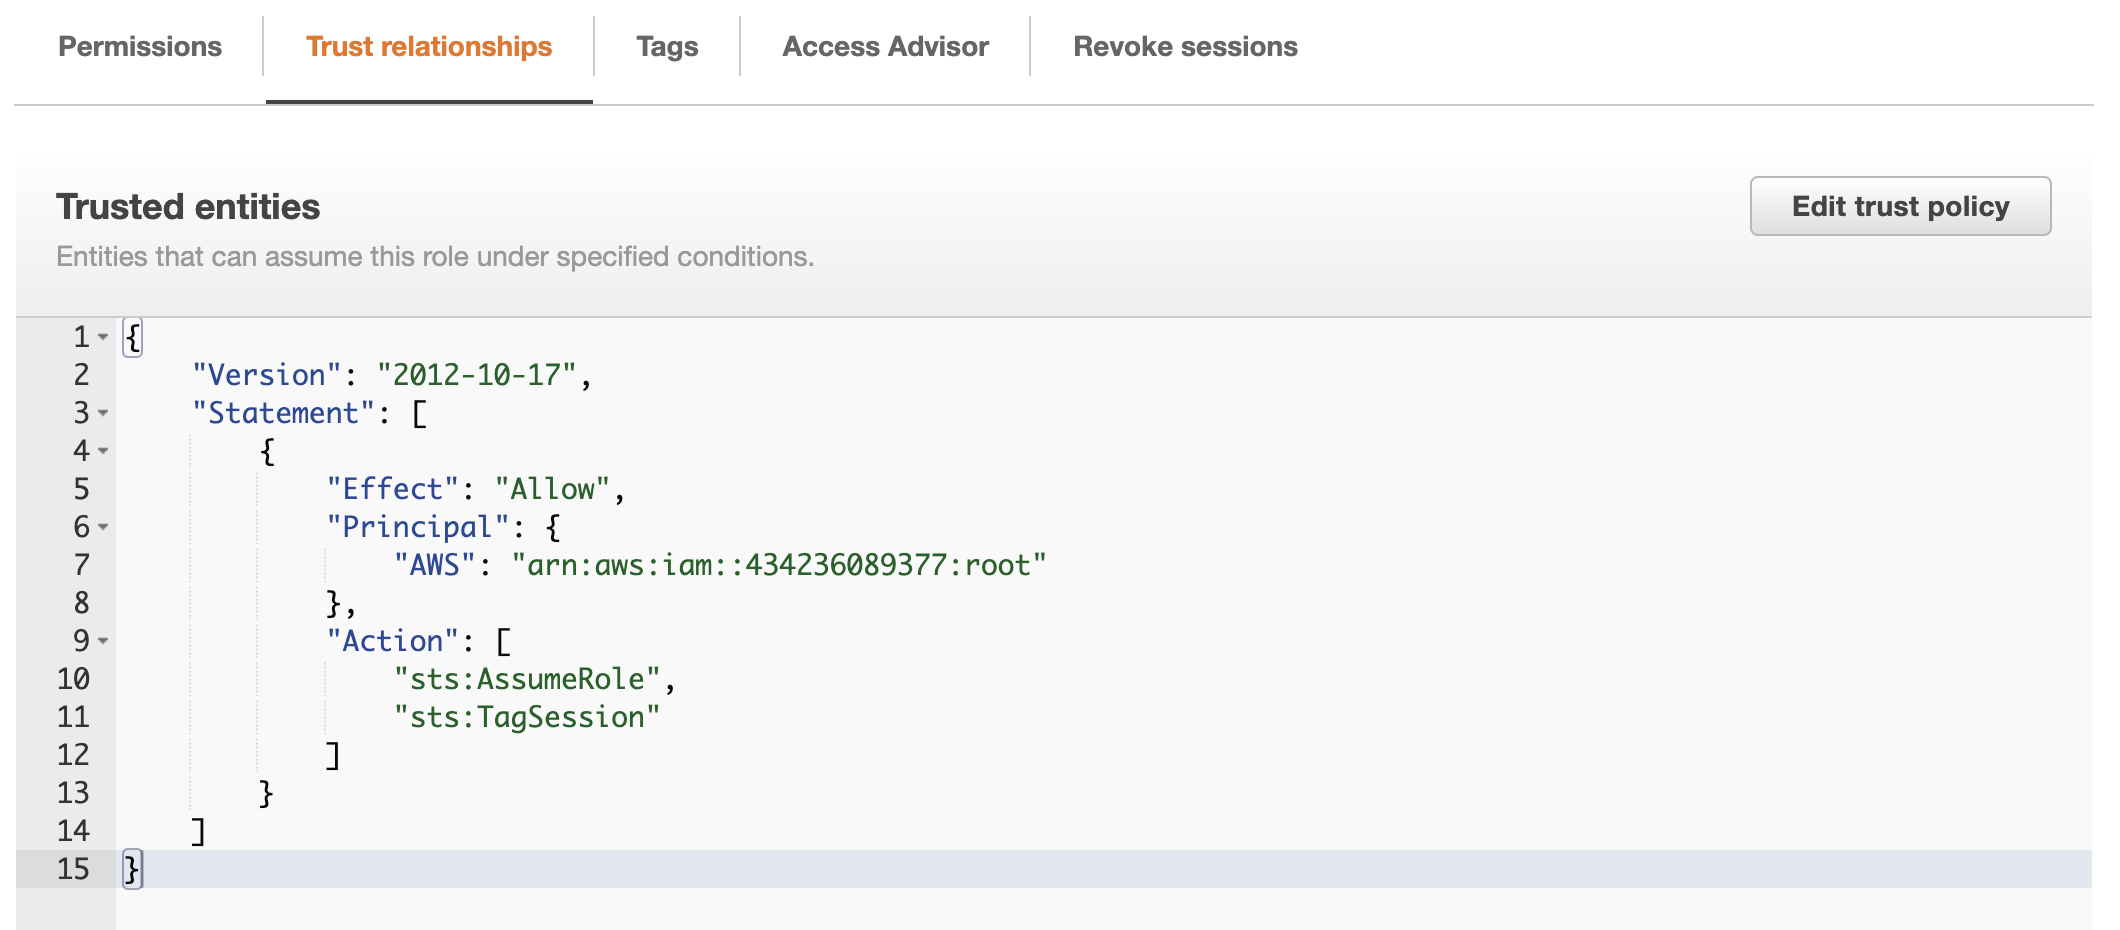
Selecting the role, you can confirm it has the correct permissions as well as a trust relationship with the account where Fix Inventory is deployed:
-
Open the AWS Organizations Console and find the Organization Unit (OU) where you want to deploy the
FixInventoryAccessrole. The role will be deployed to all accounts in this OU and all child OUs.The OU is the cryptic string underneath the OU name. To deploy the role to all accounts in the organization, use the Root OU (
r-7h7xin the below example). -
Execute the following in your terminal, replacing the values of
AWS_OUandFIX_ACCOUNT_IDwith your OU and the ID of the account where you have Fix Inventory deployed:AWS_OU="r-7h7x" # Replace with your OU
FIXINVENTORY_ACCOUNT_ID="434236089377" # Replace with your Fix Inventory account ID
aws cloudformation create-stack \
--region us-east-1 \
--stack-name FixInventoryAccess \
--template-url https://fixinventorypublic.s3.amazonaws.com/cf/fixinventory-stackset.template \
--parameters ParameterKey=DeploymentTargetOrganizationalUnitIds,ParameterValue="$AWS_OU" ParameterKey=FixInventoryAccountID,ParameterValue=$FIX_ACCOUNT_IDinfoThe region can be changed to any region you like, but IAM is a global service running in
us-east-1.
Configuring Fix Inventory to Assume the FixInventoryAccess Role and Scrape the Organization
-
In Fix Inventory Shell, execute
config edit fix.workerand locate theawssection. -
Modify the configuration as follows:
aws:
  role: 'FixInventoryAccess'
  scrape_org: true
  assume_current: true
  do_not_scrape_current: true
The
assume_currentanddo_not_scrape_currentoptions depend on your organization setup. They control whether Fix Inventory should assume the role inside the account it is running in, or just collect that account with the permissions it already has. (For instance, if you deploy Fix Inventory using Kubernetes and it is using a service account that is already using theFixInventoryAccessrole, there would be no need to assume the same role again.)